
Europe · Hardware Manufacturer
Gretsch-Unitas (GU) — Window Cleaning Guide
🇩🇪 Germany · Last reviewed by Justin Orloff
Quick Facts
founded
1872
hq
Ditzingen, Baden-Wurttemberg, Germany
primaryMaterials
Steel, stainless steel, zinc die-cast hardware components
glazingPartner
Hardware supplier - fitted to profiles from all major manufacturers
marketTier
Premium
Brand at a Glance
- Founded: 1872
- HQ: Ditzingen, Baden-Wurttemberg, Germany
- Market position: Premium European window, door, and access hardware manufacturer
- Primary products: Tilt-and-turn hardware, espagnolette systems, multipoint locks, hinges, access control
- Key ranges: GU Secural, GU Ferco, GU BKS, GU Winkhaus (separate brand)
- Compatibility: Hardware fitted to profiles from all major European manufacturers
- Market coverage: Residential, commercial, and security-rated applications
- Certification: CE marking, EN 13126 hardware standard compliance, security ratings
- Distribution: Pan-European - hardware found in windows across all European markets
- Website: g-u.com
Product Range
- Tilt-and-turn locking hardware
- Multipoint door locks
- Tilt-and-turn hinges
- Sliding and lift-and-slide hardware
Why This System
GU hardware is a system - individual components (rod, gearbox, hinge, keep) are designed to work together. Mixing GU and non-GU components in a locking system can cause compatibility issues that appear as stiff operation or incomplete locking. GU hardware is adjustable. Tilt-and-turn hinges have three-axis adjustment that allows the sash to be re-aligned after the window has settled. This adjustment is a maintenance task, not a repair. The GU Secural range includes security-rated locking hardware. Security-rated keeps and cams are deeper and stronger than standard hardware - they can look like a defect to an untrained eye when they engage firmly. GU produces hardware under multiple brand names including Ferco and BKS. The GU brand name is not always visible on every component - the system design and component shape are the identifying features. Access control hardware from GU (electronic locks, motorised drives, and escutcheons with electronic functions) requires a different maintenance approach from mechanical hardware. Water is never appropriate near electronic hardware components.
Step 1 of 2: Manufacturer Recommendations
Official Care Guidance
Source: ORLOFFS PROFESSIONAL GUIDANCE - BASED ON GRETSCH-UNITAS PUBLISHED INFORMATION AND 25 YEARS FIELD EXPERIENCE
Glass
- Standard glass cleaning - lukewarm water with mild dish soap, microfibre T-bar, professional squeegee.
- GU hardware is on the frame and sash edge, not on the glass. Standard glass cleaning technique applies without modification.
- Keep cleaning solution away from electronic GU hardware components.
- Dry the glass edge adjacent to locking cams and hinge bodies after cleaning.
Frames
- Clean frame surfaces with pH-neutral cleaner appropriate for the profile material (PVC, aluminium, or timber).
- Wipe GU hardware faces with a damp cloth and dry immediately - all GU hardware metals are susceptible to rust staining if left wet.
- Do not spray frame cleaner directly onto GU hardware - apply to a cloth first.
- Clear any cleaning product residue from the locking cam track on the frame face.
Hardware
- Lubricate espagnolette rod guides with light machine oil annually. Apply to the guide clips along the sash edge, not to the rod itself.
- Lubricate corner gearbox input shaft at the small shaft entry point on the gearbox body.
- Apply a small amount of dry lubricant or light oil to locking cam contact surfaces.
- Check hinge alignment annually - adjust with hex key if any sash shows a gap or rub against the frame.
Step 2 of 2: The Orloffs Protocol
The Orloffs Protocol
This is how I clean Gretsch-Unitas (GU) windows. The tools and technique below come from 25 years of daily professional work on the glass. Every step has been tested on real installations and adapted specifically for Gretsch-Unitas (GU) systems.
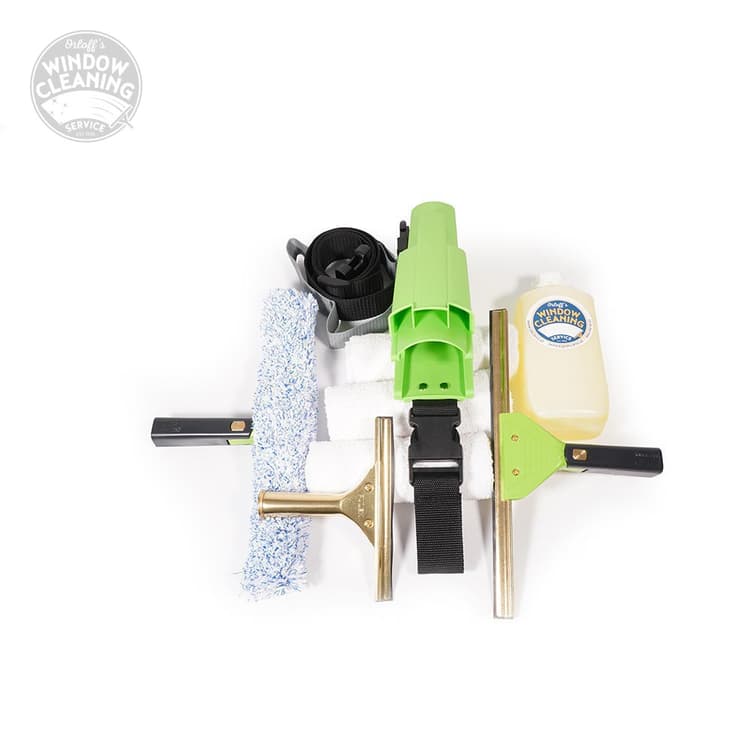
Pro Tools
My daily tool list. This is what I carry to every job.
Follow these steps in order. Each one builds on the last. This is the same sequence I use on every Gretsch-Unitas (GU) installation.
- 1
Preparation -- before any water touches the glass
Fill the bucket with at least 10 litres of water. Add soap for cleaning power -- enough to cut through environmental deposits, not so much you are fighting foam.
Before touching the glass, brush down the surface to remove loose dust, spiderwebs, and debris. Any grit left on the glass during the wash phase risks scratching during agitation.
Check the aluminium frame condition before you start. Confirm which cleaning product is safe for that surface before opening any bottle.
Cover anything below the windows that cannot be moved.
- 2
Agitation -- apply and work the solution
Dip the microfiber T-bar completely into the soap water, both sides. Remove excess water with your hand so it does not drip. Apply the solution across the entire glass surface with overlapping passes.
The goal is to fully dissolve and release every deposit from the glass surface. Anything not released during agitation gets transported across the glass by the squeegee as a smear.
For stubborn spots -- insect marks, salt residue, environmental deposits -- re-apply soap water and allow it to soak for a full minute before agitating again. Use more soap water, not more pressure.
For panels above arm reach: attach the T-bar to an extension pole. Work in sections -- top first, then middle, then bottom -- keeping each section wet until you squeegee it.
Rinse the T-bar cover regularly during the job. A dirty applicator causes microscopic scratches that accumulate over time.
- 3
Detail the frame edge before squeegeeing
Use your 100% cotton towelling rag, finger pressed into the fabric, to work into every junction and remove pooled soap water before the squeegee pass.
This prevents drips running down onto already-cleaned areas during squeegeeing and keeps soap water out of drainage channels.
On Gretsch-Unitas aluminium frames, pay particular attention to the bottom edge where glass meets the frame sill -- water pooled here runs into drainage openings and leaves residue over time.
- 4
The squeegee
Tilt the squeegee at a slight angle so soap water spills from one side of the channel only -- not both. If the rubber is jumping or squeaking, either the rubber is not lubricated enough or the glass surface has warmed.
Cutting in: start with the rubber blade making first contact on a dry edge of the glass.
Side to side: horizontal passes across the panel. Works well on wide sections. Top to bottom: vertical passes down the panel. Works well on tall narrow sections.
The J tune: one smooth unbroken motion top to bottom, wrist rotating at each end to reverse without lifting the rubber. The most efficient method on larger panels -- but it requires training before applying it to premium glass.
Wipe the rubber dry after every pass. Overlap each stroke by 2-3 cm.
- 5
Final edge detailing
After squeegeeing, there is always a residual line of water along the bottom edge and at the panel sides. Take a dry cotton rag, fold to a clean corner, and detail these edges in one smooth pass.
On Gretsch-Unitas frames, the bottom edge where glass meets the sill requires the most careful attention. Water left here runs into drainage and leaves residue that affects the next clean.
Rotate the rag to a clean section after every pass. If the rag picks up grit at any point, replace it immediately.
- 6
Frame wipe and hardware check
On Gretsch-Unitas powder-coated aluminium frames: use pH-neutral cleaner only, never abrasive pads or steel wool. Dry immediately after wiping.
Check that all drainage openings are clear and unobstructed. Water must be able to flow freely -- a blocked channel leads to accumulation that affects seal performance over time.
Operate every opening window through its full range. Stiff handles or resistance at locking points indicate hardware that needs lubrication. Flag it to the owner rather than forcing it.
Pro Tips
- GU hardware lubrication is about the rod guides, not the rods. The rod itself slides inside the guide clips - oil goes on the clips, not on the full length of the rod.
- The corner gearbox is the most common failure point in a tilt-and-turn system. It can be lubricated from the shaft entry point on the gearbox body. A gearbox that is still stiff after lubrication is worn and needs replacing.
- On GU Secural security-rated systems, the locking cams are deliberately more substantial than standard cams. The handle may feel slightly heavier to operate - this is normal. A cam that does not fully engage is a keep alignment issue, not a hardware defect.
- GU hinge adjustment should always be made with the sash in the closed position and the window locked. Adjusting with the sash open changes the load on the hinge and makes setting the gap inaccurate.
- Older GU espagnolette systems from the 1980s and 1990s use a different rod section size than current hardware. Replacement parts must match the rod size - current GU parts may not be directly compatible with older system dimensions.
- Electronic GU hardware (motorised drives, electronic escutcheons) should only be serviced by a qualified locksmith or access control technician. Never attempt lubrication or adjustment of electronic hardware components.
- When identifying GU hardware on an unfamiliar installation, look for the GU logo on the handle escutcheon, the locking cam bodies, or the hinge face. The logo is a stylised GU monogram and appears on most visible components.
What NOT To Do
- Do not spray cleaning product directly onto GU hardware components - apply to a cloth first.
- Do not apply oil to the rubber seals adjacent to GU hardware components - oil degrades rubber over time.
- Do not apply water or lubricant near electronic GU hardware.
- Do not force a stiff GU handle - locate the cause (dry guides, dry gearbox, or misaligned keep) before applying force.
- Do not mix GU and non-GU locking system components without confirming compatibility.
Bundle Kits and Tool Recommendations
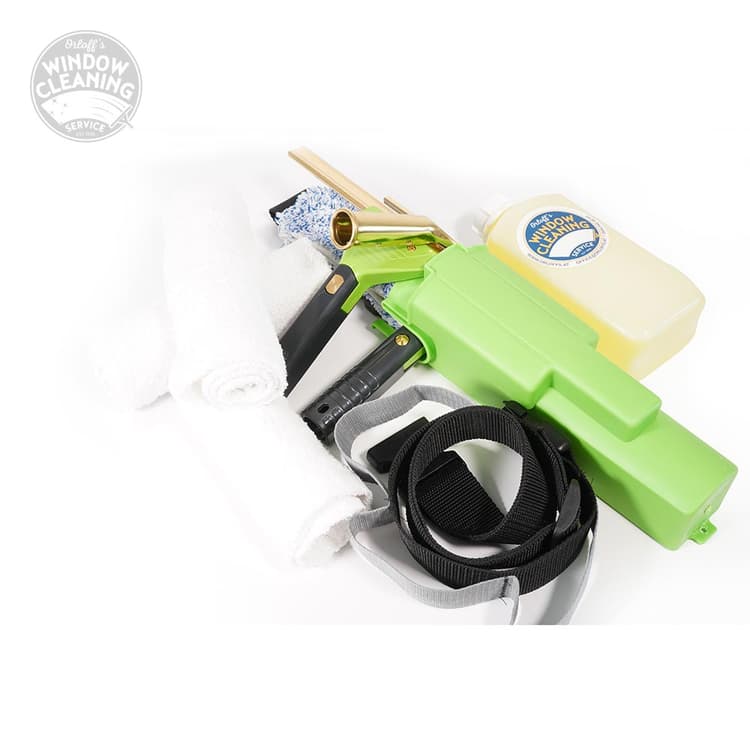
Bundle Kit
Cleaning Frequency
Glass and frames: 2x per year minimum (Hardware is cleaned as part of the frame clean at each visit.). Hardware lubrication: Once per year (Annual lubrication of all GU mechanical hardware. More frequently on high-use doors.). Hinge alignment check: Once per year (Annual check prevents sash drop from becoming a misalignment problem.). Electronic hardware check: As specified by access control system (Electronic hardware servicing follows the access control maintenance schedule, not the window cleaning schedule.)
Frequently Asked Questions
Field Notes
“GU hardware is the most commonly encountered tilt-and-turn window hardware in the European residential market. Recognising GU components and knowing the correct lubrication approach is one of the most useful skills a window maintenance professional can have. The corner gearbox on GU tilt-and-turn systems is often neglected because it is hidden behind the corner cover on the sash edge. It is also the component that fails first when maintenance is deferred. A 2-minute lubrication visit every year prevents a 200-euro repair. GU three-axis hinge adjustment is one of those skills that seems complex until you do it a few times. A sash that fits properly after adjustment is the most tangible result of a window maintenance visit that the client can see and feel.”
Justin Orloff
What's next for you?
The Skill
New to window cleaning?
Start with the core techniques before tackling premium systems.
Start Learning →The Standard
Upskill your team
Covers every system, product type, and tricky scenario.
View The Standard →Manufacturer
Partner with Orloffs
Are you Gretsch-Unitas (GU) or a similar manufacturer? Let's create official cleaning guidance together.
Get in Touch →