
You've tried everything
Paper towels? Streaks.
Vinegar solution? Still streaks.
Expensive blue spray from the store? You guessed it—streaks.
You've watched YouTube videos, followed Pinterest tips, and even tried the newspaper trick your grandmother swore by. But every time you step back to admire your work, there they are: those frustrating streaks catching the light, mocking your effort.
Here's the truth most people don't realize: You don't have a product problem. You have a technique problem.
Professional window cleaners don't have access to magic solutions. They use the same basic soap and water you do. The difference? They've mastered a simple 5-minute technique that delivers streak-free results every single time.
In this guide, I'll teach you that exact technique. By the end, you'll understand why your windows streak, what professionals do differently, and how to get crystal-clear results in just 5 minutes per window.
[IMAGE PLACEHOLDER: Hero image - Professional cleaning a window with perfect streak-free result]
WHY DO WINDOWS STREAK? THE SCIENCE EXPLAINED
Before we fix the problem, let's understand what causes streaks in the first place.
1. Residue Left Behind
When you wipe a window with paper towels or cloth, you're not removing cleaning solution—you're spreading it around. The solution dries, leaving behind a thin film of soap residue. That residue? That's your streak.
Think of it like mopping a floor. If you don't rinse the mop water off completely, you get a sticky film. Windows work the same way.
2. Water Evaporation Issues
Ever notice streaks are worse on sunny days? That's because the cleaning solution evaporates too quickly. The water disappears before you can wipe it away, leaving concentrated soap behind.
This is why professionals avoid cleaning windows in direct sunlight or on hot days.
3. Wrong Tools Push Dirt Around
Paper towels seem logical—they're designed to absorb liquid, right? But on glass, they have two problems:
- They leave behind microscopic paper fibers (those are streaks too)
- They push dirt around rather than removing it
Newspapers, despite grandma's advice, have the same issue. Plus, the ink can transfer to your frames.
4. Wrong Squeegee Angle
This is the big one. If you're using a squeegee (good!) but still getting streaks, it's almost certainly an angle problem.
Most people hold the squeegee perpendicular to the window (90 degrees) or nearly flat (15-20 degrees). Both create streaks.
The professional secret? 45 degrees. That's it.
[IMAGE PLACEHOLDER: Diagram showing incorrect angles (90° and 15°) vs correct angle (45°)]
THE 5-MINUTE PROFESSIONAL TECHNIQUE
Alright, enough theory. Let's get to the method that actually works.
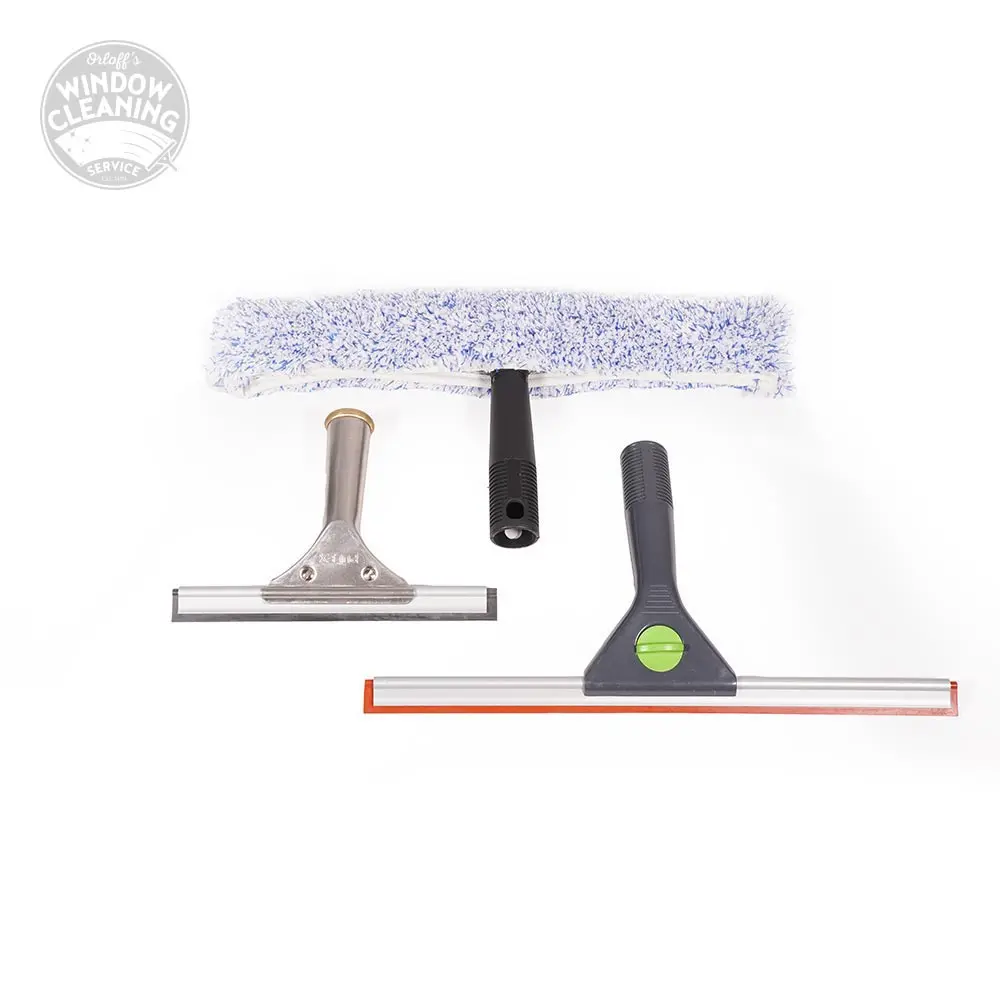
STEP 1: Get the Right Tools (1 minute)
You need four things:
1. Professional squeegee (10-12 inches for home windows)
Buy a basic one for $8-15 at any hardware store. Unger and Ettore are reliable brands. Skip the telescoping handle for now—that's for tall windows.
2. Microfiber scrubber or T-bar applicator
This applies the cleaning solution. It's basically a mop for windows. Cost: $5-10.
3. Cleaning solution
Here's the secret professionals don't advertise: expensive cleaners don't matter. Use this formula:
- 1 blop of dish soap (Dawn or similar)
- Mixed with 1 gallon of water
That's it. One drop. More soap = more residue = more streaks.
4. Microfiber towel for edges
Any microfiber towel works. Have 2-3 on hand.
What you DON'T need:
- ❌ Windex or fancy spray bottles
- ❌ Paper towels
- ❌ Newspaper
- ❌ Special "streak-free" formulas
These are marketing gimmicks. Save your money.
STEP 2: Wet the Window (30 seconds)
Dip your scrubber in the cleaning solution (one blop of soap + water).
Apply the solution to the window in an S-pattern, working from top to bottom.
Why S-pattern? It ensures full coverage without leaving any spots missed. Start at the top left, curve to the top right, down and back left, continuing until the entire window is wet.
Make sure you cover:
- The entire glass surface
- All the way to the edges
- Especially the corners (often missed)
The window should look uniformly wet with no dry spots.
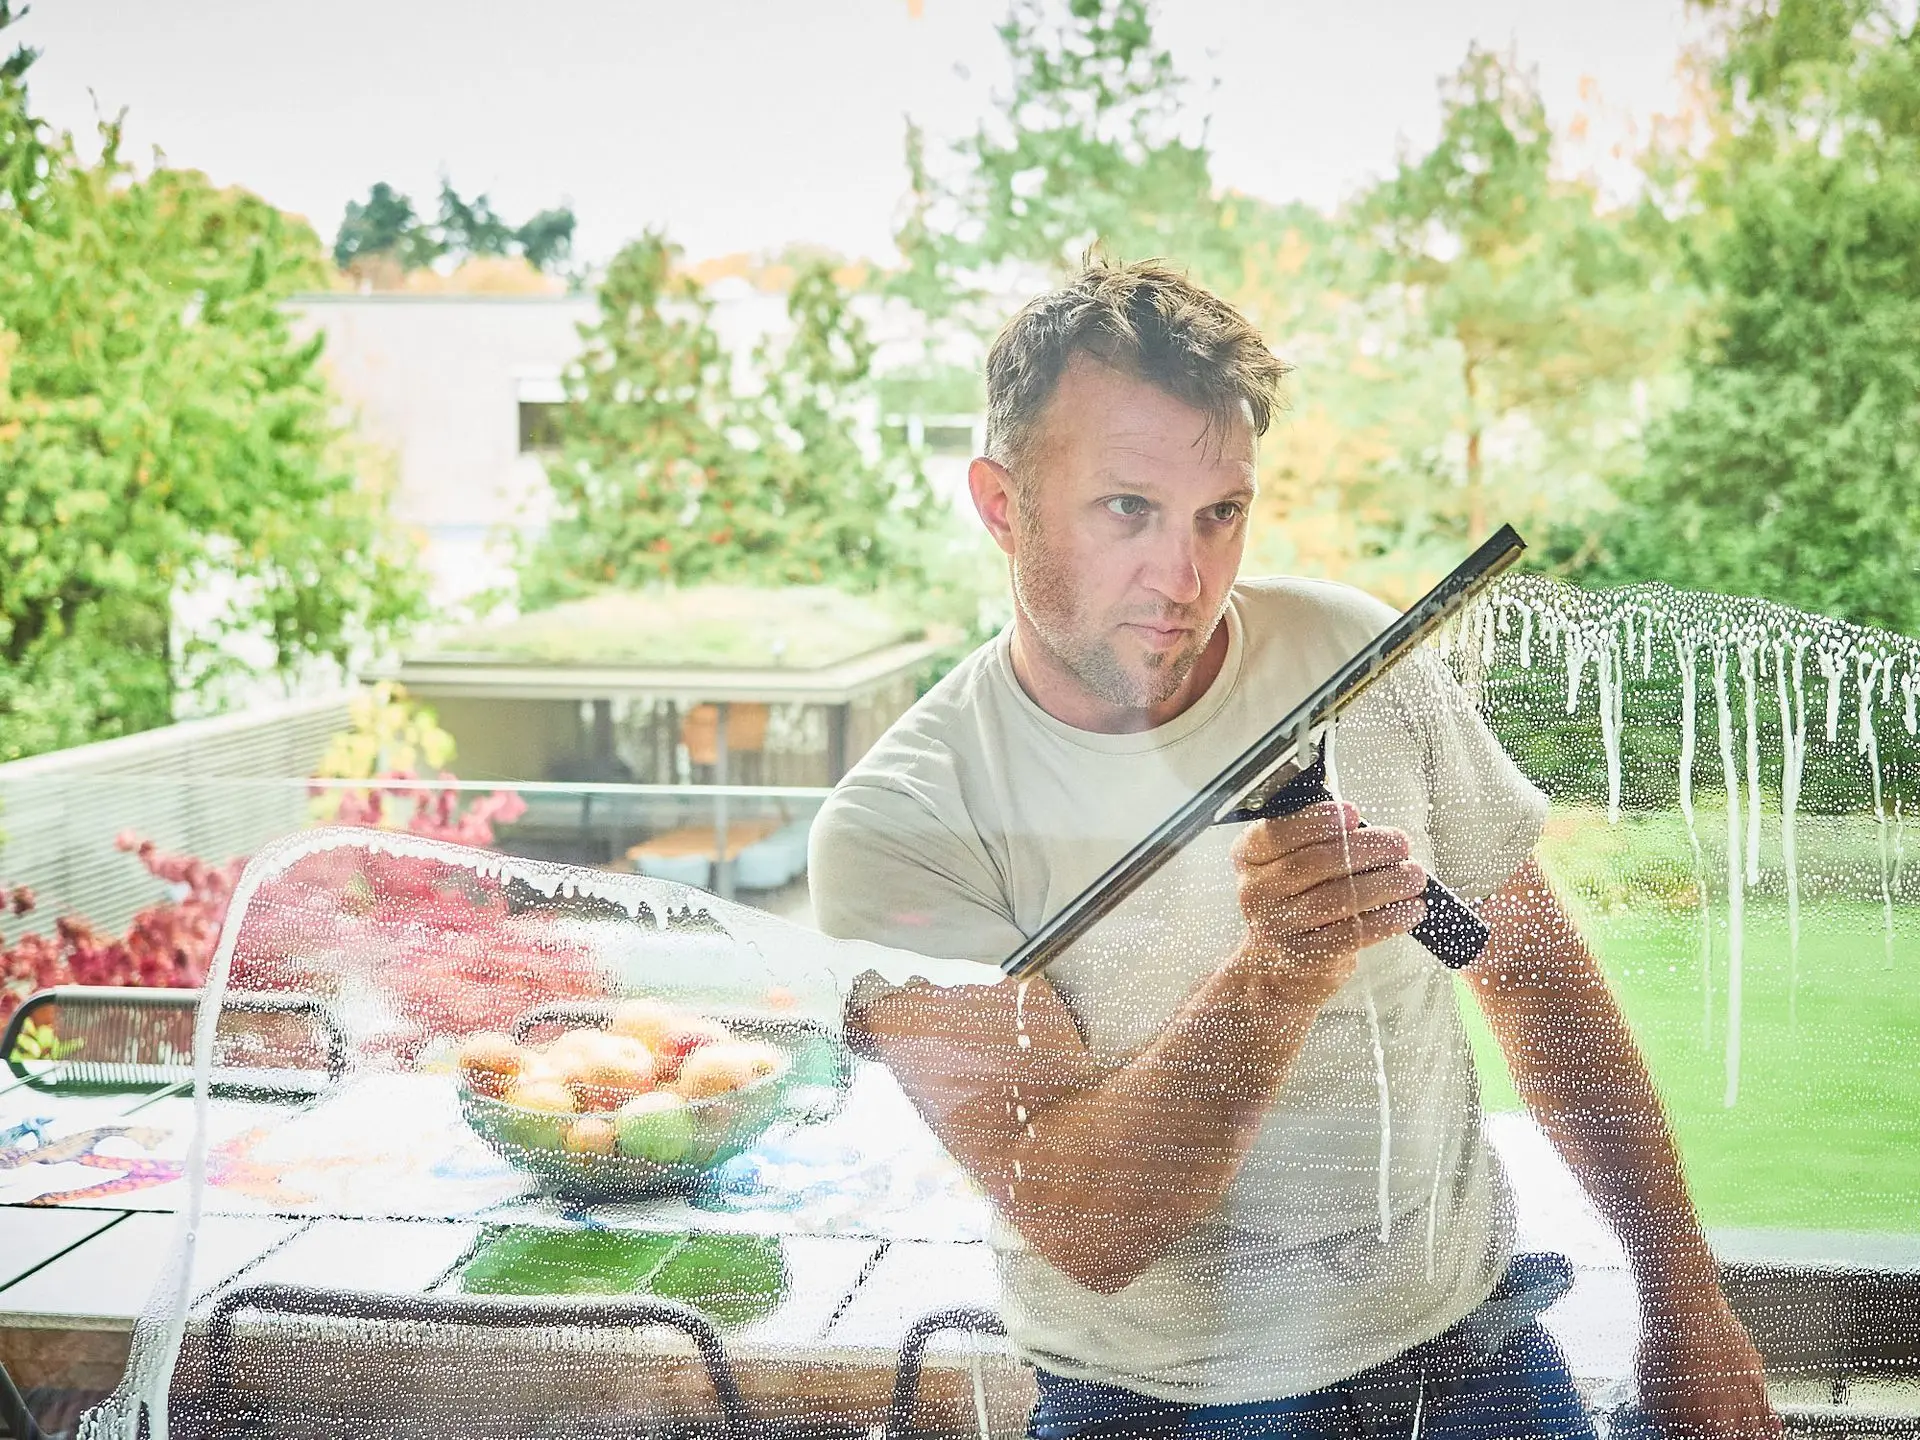
STEP 3: The Squeegee Technique (2 minutes)
This is where 90% of people fail. Pay close attention.
Starting Position:
- Place thethe squeegee blade in the top left corner of the window
- Hold the squeegee at a 45-degree angle
- Apply firm but not aggressive pressure
The Pull:
- Pull the squeegee straight down in one smooth motion
- Don't curve or wave—straight line only
- Maintain the 45-degree angle throughout the entire stroke
- Speed: Moderate. Not fast, not slow. About 2 seconds per vertical stroke on a standard window.
The Reset (CRITICAL):
After EVERY stroke, wipe the squeegee blade with your microfiber towel.
This is non-negotiable. A dirty blade spreads dirt and water, causing streaks.
Pros wipe after every single stroke. You should, too.
The Overlap:
Move the squeegee about 1 inch to the right, overlapping your previous stroke slightly.
Pull down again. Wipe blade. Move 1 inch right. Repeat.
Continue working left to right across the entire window.
Why 45 degrees matters so much:
- Too steep (60-90°): Water stays on the window, causing streaks when it dries
- Too flat (0-30°): Squeegee blade skips and chatters, leaving water behind
- 45° (perfect): Blade maintains consistent contact, removing all water
STEP 4: Detail the Edges (1 minute)
Your window looks great, but there's still water on the edges where the squeegee couldn't reach.
Use your microfiber towel to wipe:
- Top edge (where you started the squeegee strokes)
- Left and right edges
- Bottom sill (catches all the water)
This step separates amateurs from professionals. Skipping it leaves obvious water marks that will streak when they dry.
Pro tip: Fold your towel into quarters. This gives you 8 clean surfaces to use before needing a fresh towel.
STEP 5: Final Check (30 seconds)
Step back 3-4 feet from the window and look at it from an angle (not straight on).
This reveals any missed spots or remaining streaks.
See something? Do one more quick squeegee pass over that area.
Most professionals achieve perfect results in one pass. You might need 2-3 passes while learning. That's normal.
Total time: 5 minutes
(With practice, you'll get it down to 2-3 minutes per window)
COMMON MISTAKES THAT CAUSE STREAKS
Even with the right technique, these mistakes can sabotage your results:
Mistake #1: Cleaning in Direct Sunlight
The Problem: Water evaporates too quickly, leaving soap residue.
The Fix: Clean windows on overcast days, or early morning/late evening when sun isn't directly on the glass. Ideal temperature: 50-70°F.
Mistake #2: Too Much Soap
The Problem: More soap doesn't mean cleaner windows. It means more residue.
The Fix: Use the "1 drop per gallon" rule. It seems too little, but trust it. You can always add a second drop if windows are extremely dirty, but start with one.
Mistake #3: Dirty Squeegee Blade
The Problem: A blade with dirt, dried soap, or debris spreads streaks.
The Fix: Wipe your blade after every stroke. Inspect it regularly and clean it thoroughly between windows.
Replace rubber blades every 3-6 months if you're cleaning regularly.
Mistake #4: Wrong Angle
The Problem: This is the #1 amateur mistake. Most people either hold the squeegee too flat or too steep.
The Fix: Practice the 45-degree angle. It feels awkward at first, but muscle memory kicks in after 5-10 windows.
Want to accelerate learning? Keep reading—I'll show you a practice method that builds muscle memory 3x faster.
Mistake #5: Skipping Edge Detail
The Problem: Leaving water on edges creates obvious drip marks.
The Fix: Always do Step 4. Always. This 60-second step makes the difference between "good" and "professional."
ADVANCED TIPS FOR DIFFICULT SITUATIONS
Once you've mastered the basic technique, these advanced tips help with challenging scenarios:
Weather Conditions
Best conditions:
- Overcast days (no direct sun)
- Temperature: 50-70°F
- Low wind (won't blow dirt onto wet windows)
Worst conditions:
- Direct sunlight (causes rapid evaporation)
- Below 40°F (water can freeze mid-clean)
- High wind (dirt gets on windows immediately)
Interior vs. Exterior Windows
Interior: Generally easier. Less dirt, controlled temperature, no wind.
Exterior: More dirt, weather variables, and often harder to reach.
Technique is identical, but exterior windows may need:
- Pre-rinse with a hose if extremely dirty
- Two passes if heavily soiled
- Scraper for stuck-on debris (bird droppings, paint, stickers)
Large or Tall Windows
For windows above 6 feet, you'll need:
- Extension pole attachment for squeegee
- Ladder or step stool (if the pole isn't enough)
- Extra care maintaining the 45-degree angle at a distance
The technique doesn't change—just the equipment reach.
Textured or Specialty Glass
Textured glass: Requires extra scrubbing. Use a stiff brush before squeegeeing.
Tinted windows: Be gentle—tint film can scratch. Avoid abrasive tools.
Low-E coatings: Standard technique works fine, but never use abrasive cleaners (they damage the coating).
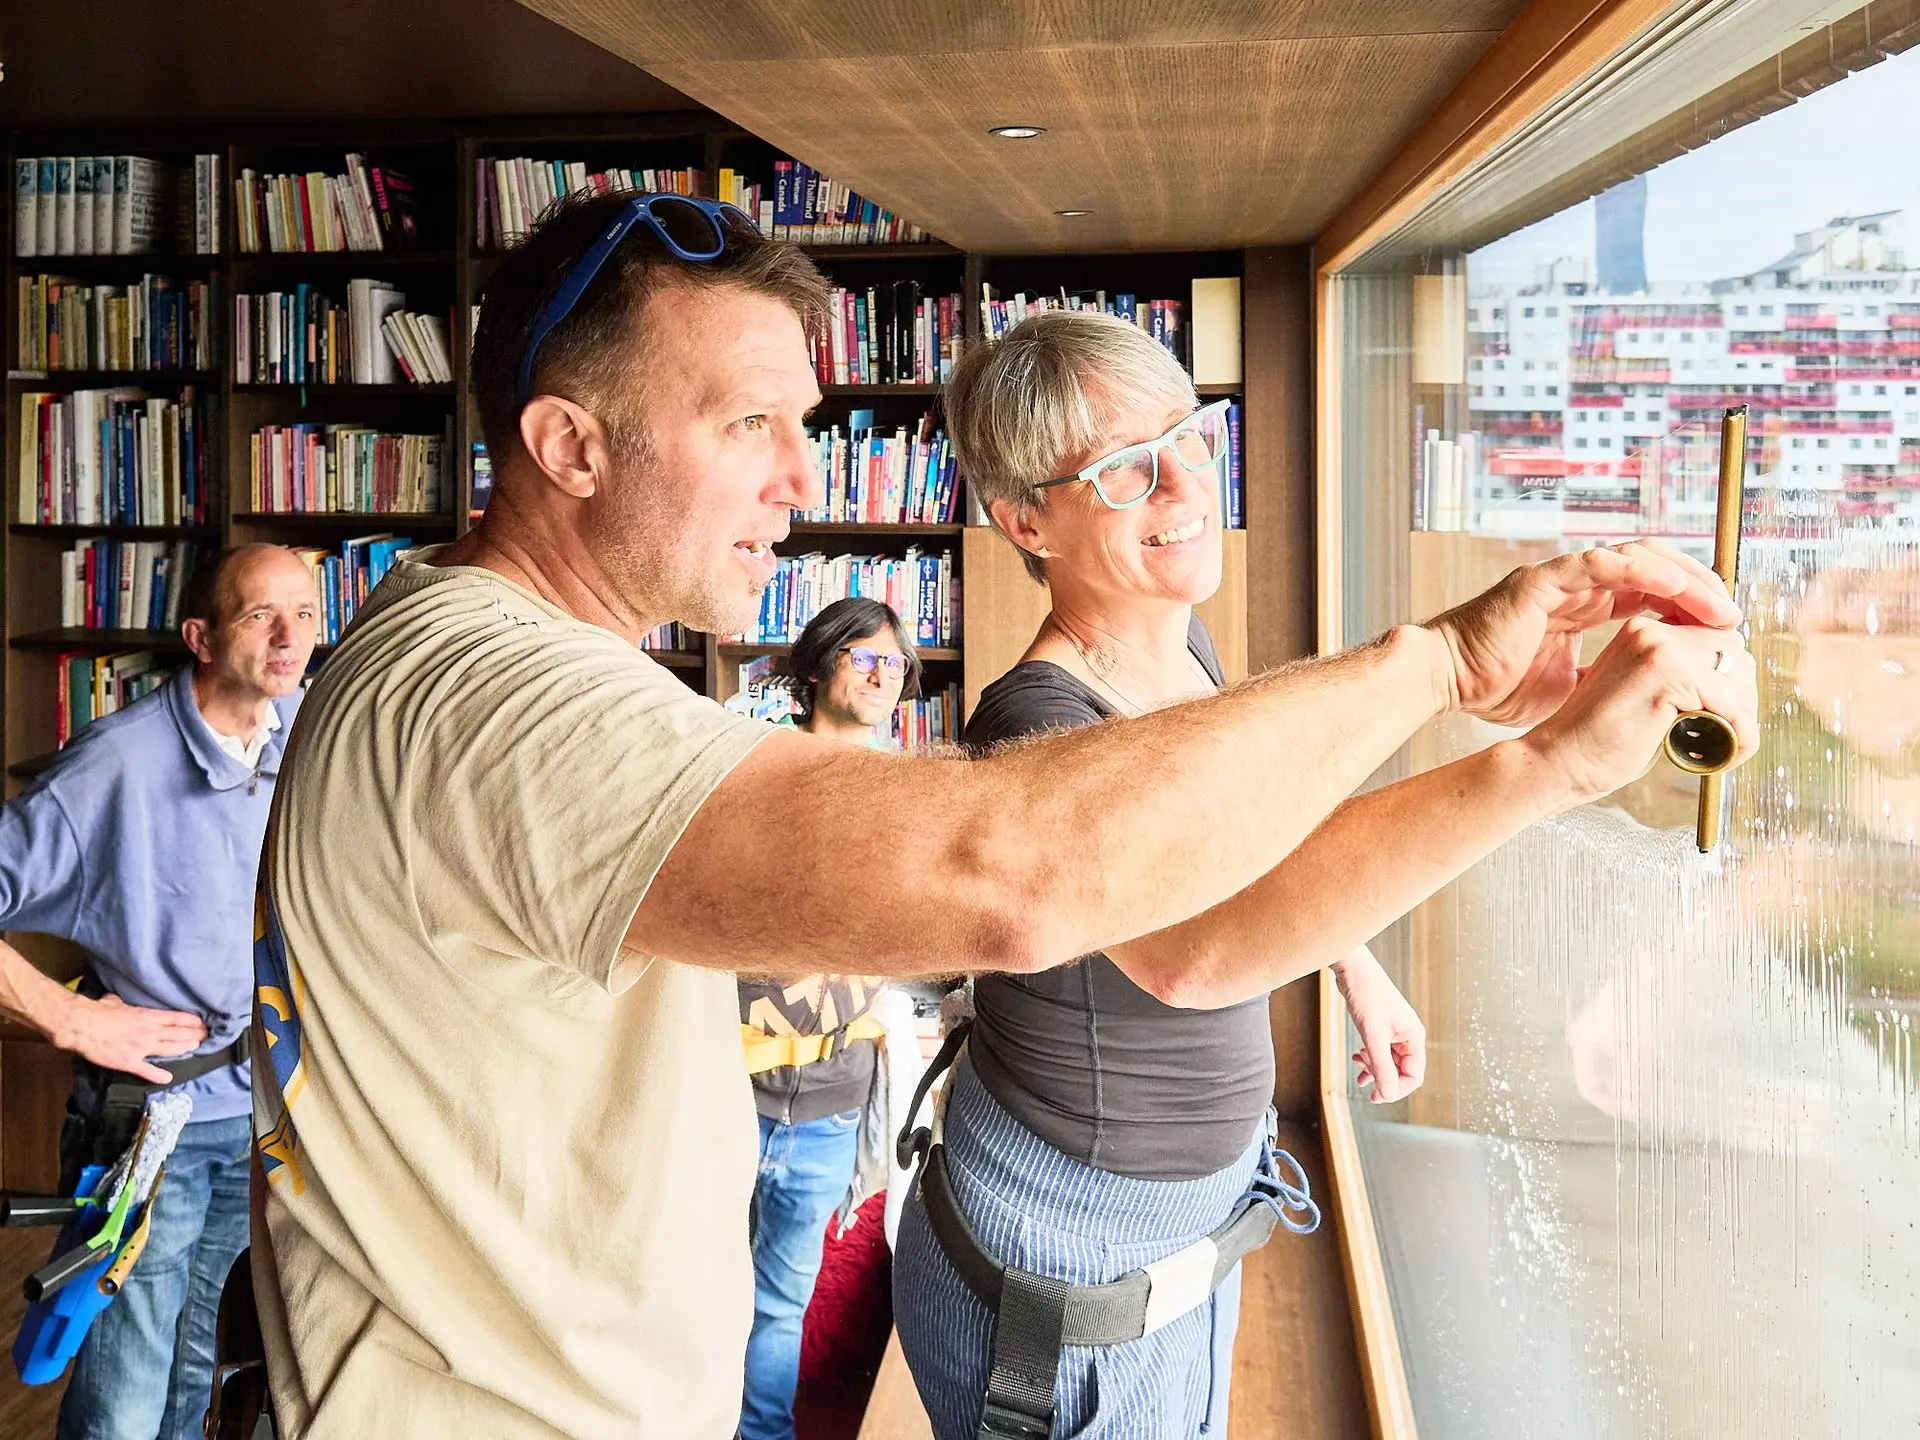
PRACTICE MAKES PERFECT: THE AR TRAINING TOOL
Here's the challenge with learning window cleaning: you can't practice without wasting time, water, and cleaning solution.
Traditional path:
- Buy equipment ($50-150)
- Mix solution
- Find practice windows
- Trial and error for 2-4 weeks
- Repeat the same mistakes until muscle memory develops
What if you could practice the 45-degree angle before touching real windows?
Introducing: AR Window Cleaning Training
We created the world's first AR (augmented reality) window cleaning training tool. Here's how it works:
- Open the app on your smartphone or tablet
- Position your device flat or against a wall
- Practice squeegee technique using your finger or with squeegee and dirty window
Why this accelerates learning:
Muscle memory develops through repetition with immediate feedback. Without feedback, you might practice the wrong technique 100 times and just get really good at doing it wrong.
The AR tool provides feedback on every stroke. You build correct muscle memory 3x faster than trial-and-error.
It's like having a professional instructor watching every practice session, but you can use it anytime, anywhere, and it never gets impatient.
The AR Training Tool is Step 2 of Orloff's Training Program, included in all paid tiers ($69, $199, or $1,999).
Learn more about AR Training Tool
CONCLUSION: YOUR PATH TO STREAK-FREE WINDOWS
You now know the professional technique that delivers streak-free windows every time.
The secret wasn't fancy products or expensive equipment. It was technique:
- Right tools (squeegee, scrubber, soap + water, microfiber towel)
- 45-degree squeegee angle
- Wiping blade after every stroke
- Detailing the edges
- Avoiding direct sunlight
Your Next Steps:
1. Try It Right Now
Pick one window. Follow the 5-step technique. See the difference.
One window is all it takes to prove this works.
2. Our FREE Window Cleaning Manifesto
Want the complete professional method with photos and fully described techniques?
FREE Window Cleaning Manifesto
The Manifesto is our Step 1 training module, available free to everyone. It includes:
- Detailed photo guide
- Equipment recommendations
- Pro tips from 25 years experience
3. Master the Technique with Professional Training
If you want to go beyond basics—whether you're a homeowner wanting professional-level results or someone considering a window cleaning career—Orloff's Training Program teaches you everything.
What's included:
- ✅ AR Training Tool for muscle memory (3x faster learning)
- ✅ Complete Mastery Course (90-minute deep dive)
- ✅ Progress tracking with Clear View Creator
- ✅ Certification (Cleaning Business tier)
- ✅ Direct access to Justin for questions (25+ years professional experience)
Three tiers:
- Beginner/Homeowner: $69 one-time
- Cleaning Business/Career Starter: $199 one-time (includes certification)
- White-Label/Enterprise: $1,999 + $999/year (for businesses training teams)
View Training Programs & Pricing
About the Author
Justin Orloff has been a professional window cleaner for 25+ years. He owns Orloff's Window Cleaning in Vienna, Austria—a thriving business with 35+ five-star Google reviews and a year-long booking calendar.
Justin created Orloff's Training Program to share traditional window cleaning techniques (no shortcuts!) with homeowners and aspiring professionals worldwide. The program includes the world's first AR window cleaning training tool.
Learn More About Orloff's Training Program
Frequently Asked Questions
Q: Do I really need a squeegee, or can I just use paper towels?
A: Paper towels will always leave streaks. They leave behind microscopic fibers and push water around rather than removing it. A basic squeegee costs $8-15 and lasts for years. It's worth it.
Q: What if I have really dirty windows?
A: The technique is the same, but you may need two passes. First pass removes the heavy dirt, second pass gets it streak-free. You can also pre-rinse exterior windows with a hose.
Q: Can I use Windex instead of soap and water?
A: You can, but you're wasting money. Windex is just soap, water, and blue dye. One blop of dish soap in a gallon of water works just as well and costs pennies.
Q: My squeegee blade skips and chatters. What's wrong?
A: This usually means your angle is too flat (under 30 degrees). Increase to 45 degrees. If it still chatters, your blade might be old and needs replacement.
Q: How often should I clean my windows?
A: Depends on your environment. Most homes benefit from:
- Exterior: 2-4 times per year
- Interior: 1-2 times per year
If you live near the ocean, a busy road, or have kids/pets, you may need more frequent cleaning.